WordPress and WooCommerce to create an online store
Know about WordPress and WooCommerce are the goals which show you the easiest way to build a functional WordPress e-commerce shop.
So as soon as possible, you can get your shop online.
Therefore we will focus only on the most important things about WordPress Woocommerce and ignore the more technical aspects.
Steps to create an online store with WordPress and WooCommerce
1- Receive a name of the domain and web hosting for an online store or any website of any other kind
Here two things you’ll need:
Full divulgation: The domain of your shop on the web is a domain name.
Like Yourstory.com anything.
Web hosting is essentially a remote machine that stores and then support everyone who wants to visit your website.
Once you finish buying Bluehost.
This lets us run WebsiteSetup as a business. Thank you for your assistance.
We typically get both from Bluehost.com, there are hundreds of different hosting/domain providers.
We have cost-effective web hosting and reliability (including one year’s free domain name).
They are also one of the few (official) WordPress.org hosting providers.
Is it expensive? Starting at $2.75/month!
To continue with, simply go to Bluehost.com and click on the “start.”
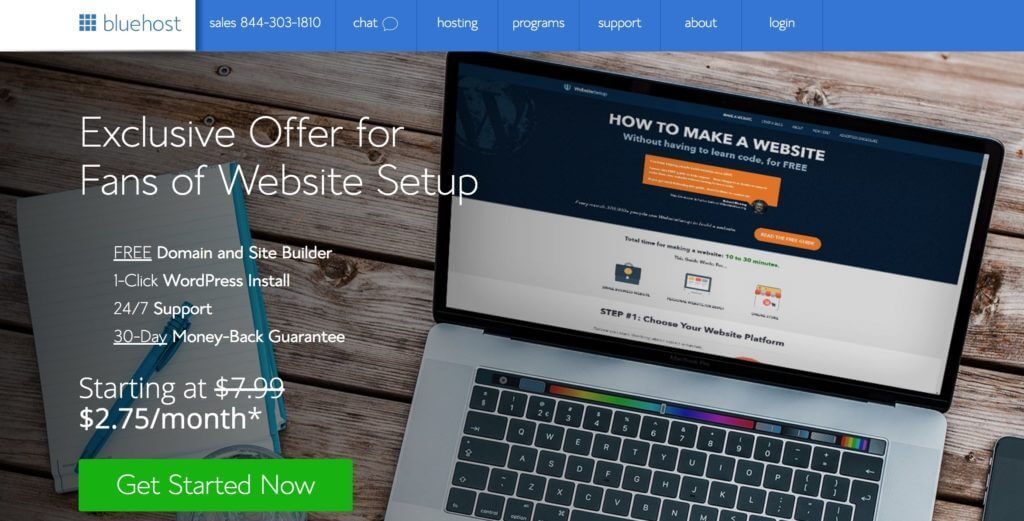
This takes you to a page that allows you to pick a shop hosting package.
The cheapest option labelled “basic” can be started.
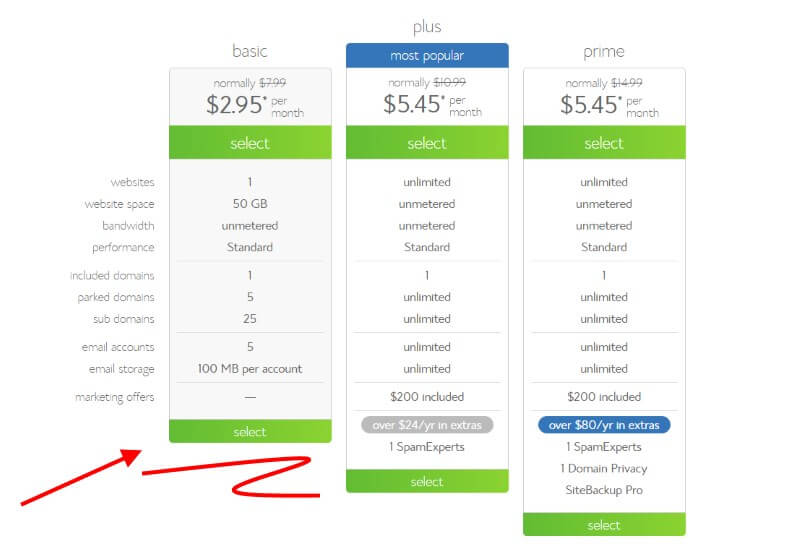
You can receive Bluehost for $2.75/mo if you use your referral links.
The next step is to choose your new online store’s domain name.
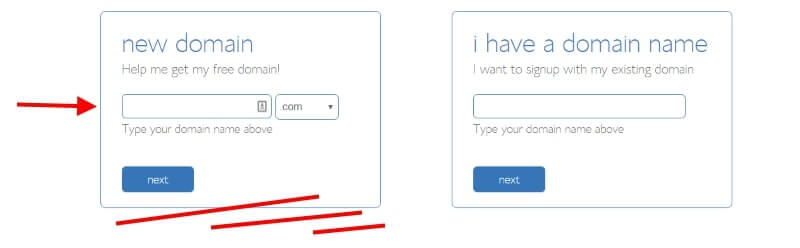
It needs a bit of brainstorming.
You generally want a unique, easy to recall and attractive name for your domain name.
If you have a company established for your store already, maybe as your domain name you ought to go with that.
When you choose your domain, the initial hosting fee can be completed and paid.
Excellent! You just have a domain name for yourself and a hosting plan to help it.
2- WordPress and WooCommerce: WordPress installation
The next move marks the beginning of your WordPress adventure.
On your hosting account, you can install WordPress.
That may sound hard, but it doesn’t.
You only have to go to my.bluehost.com usually to access your Bluehost user panel.
(In the confirmation email Bluehost will send you a link).
Once there, scroll down to the “Download WordPress” labelled button.
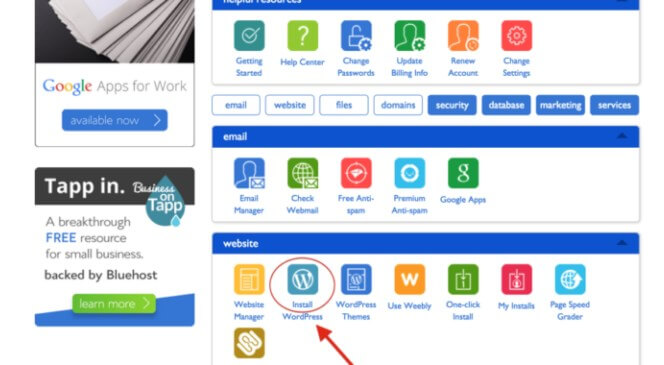
Follow the instructions on the screen, press it.
You’re going to be taken step by step throughout the entire process, nothing to worry about!
If you need more practical information to choose a domain and clean WordPress installation, go via phase 2.
A blank WordPress website should be enabled at this stage.
This can be seen by referring to the main domain name (for example, YOURSTORE.com/wp-admin).
Now is the time to turn the blank WordPress site into a fully functional e-commerce shop with a strong WooCommerce plug-in.
3- Install the plugin WooCommerce
The fun starts with navigation to your WordPress dashboard/plugins / add new like with all WordPress plugins.
Once in the search field, type “woo-commerce.”
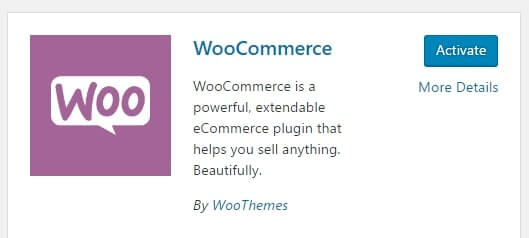
As the first search result, you will see WooCommerce:
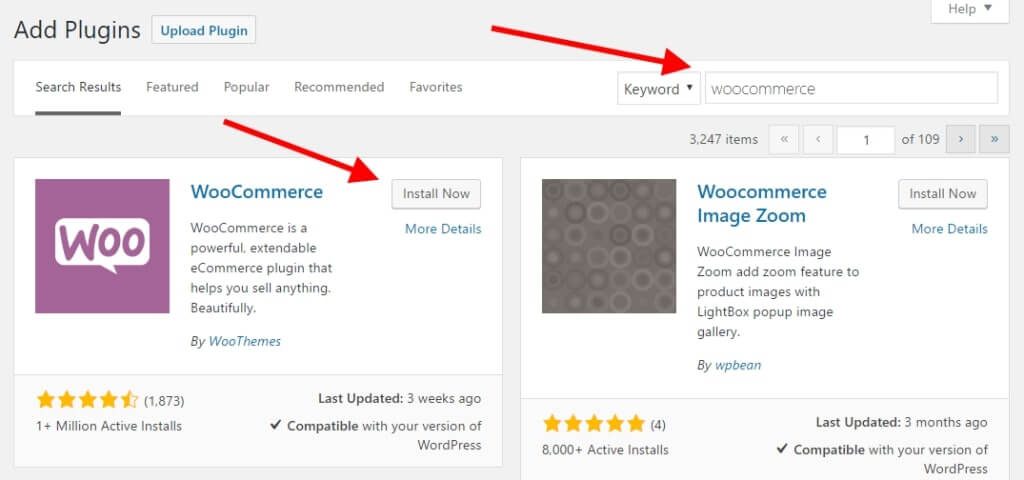
Click on the button Install now below the toolbar.
A few seconds later, you’ll change the text on the button to ‘ Activate. ‘, tap and go-ahead.
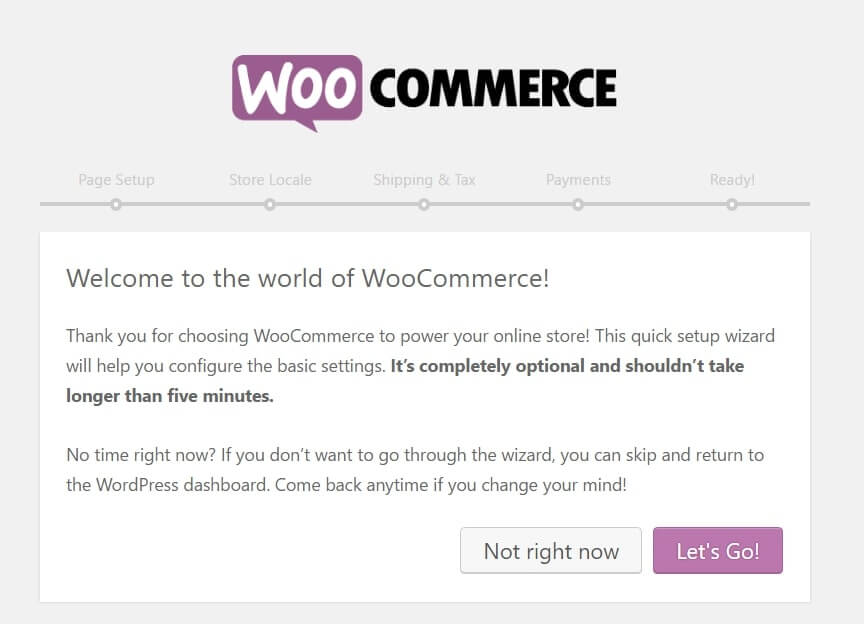
You’ll see the WooCommerce launch/setup on-screen wizard at this stage.
It makes the process all over the place and takes you by the back.
Click “Let’s Go!” to start and then adjust Woocommerce settings in your store.